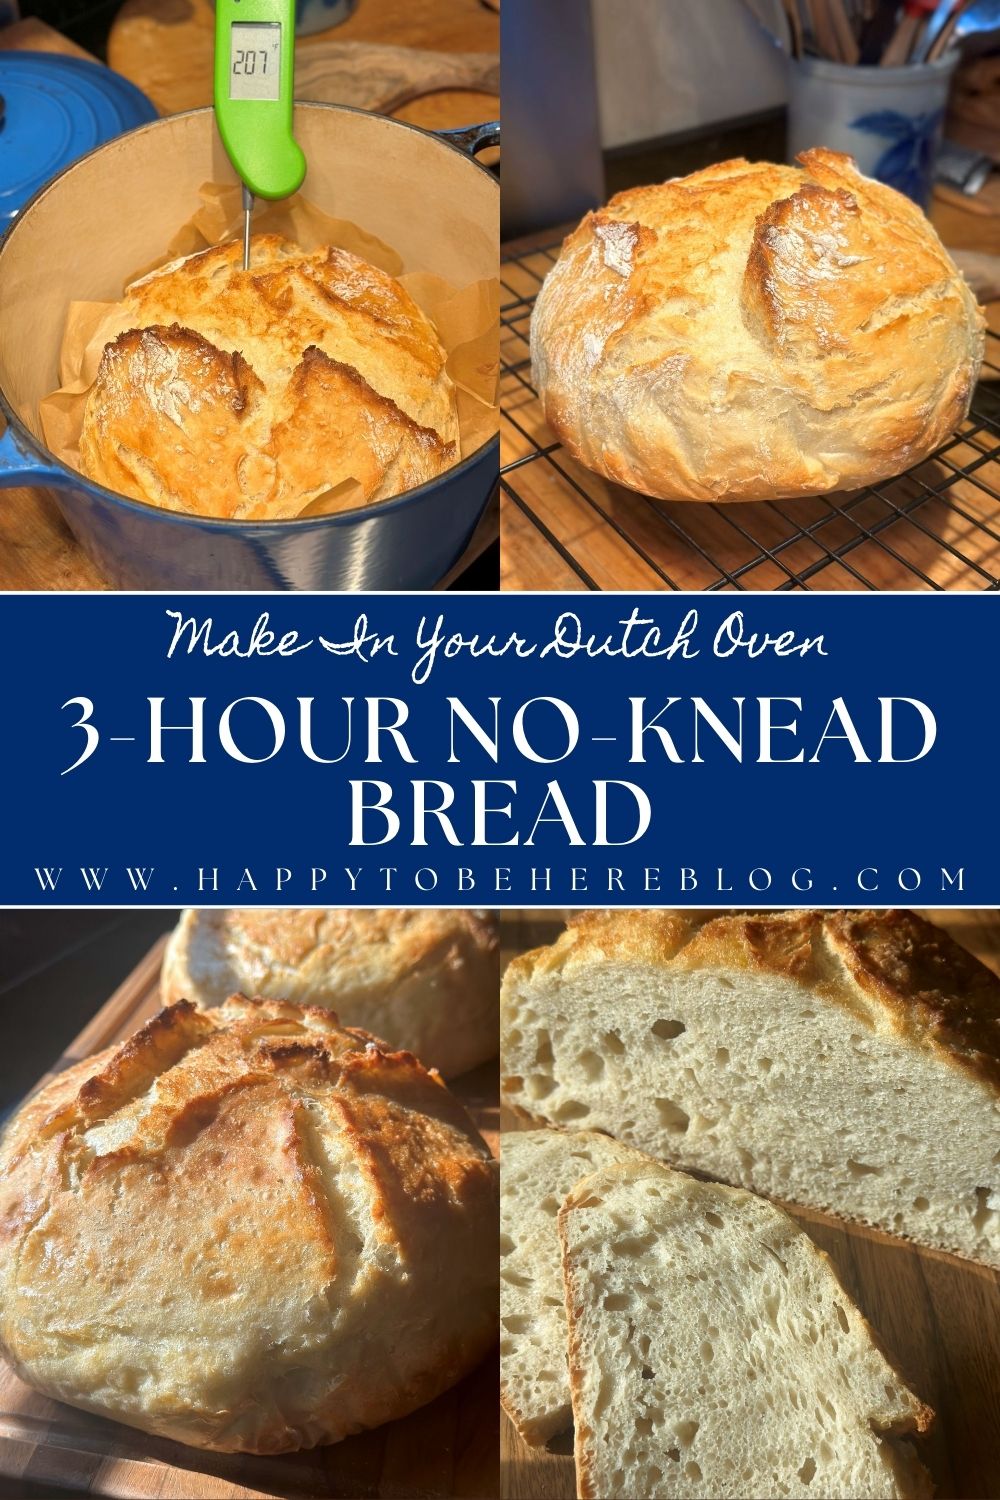
Why You’ll Love This No-Knead Bread:
- Fresh Bread in a Few Hours—Just mix together the simple dough, let it rise, and bake the bread in a Dutch oven. This process will only take 3 hours (or slightly less), allowing you to have freshly baked bread whenever the craving strikes.
- Handful of Ingredients—Just 5 simple ingredients (that are probably sitting in your pantry right now) will yield a tasty loaf of bread.
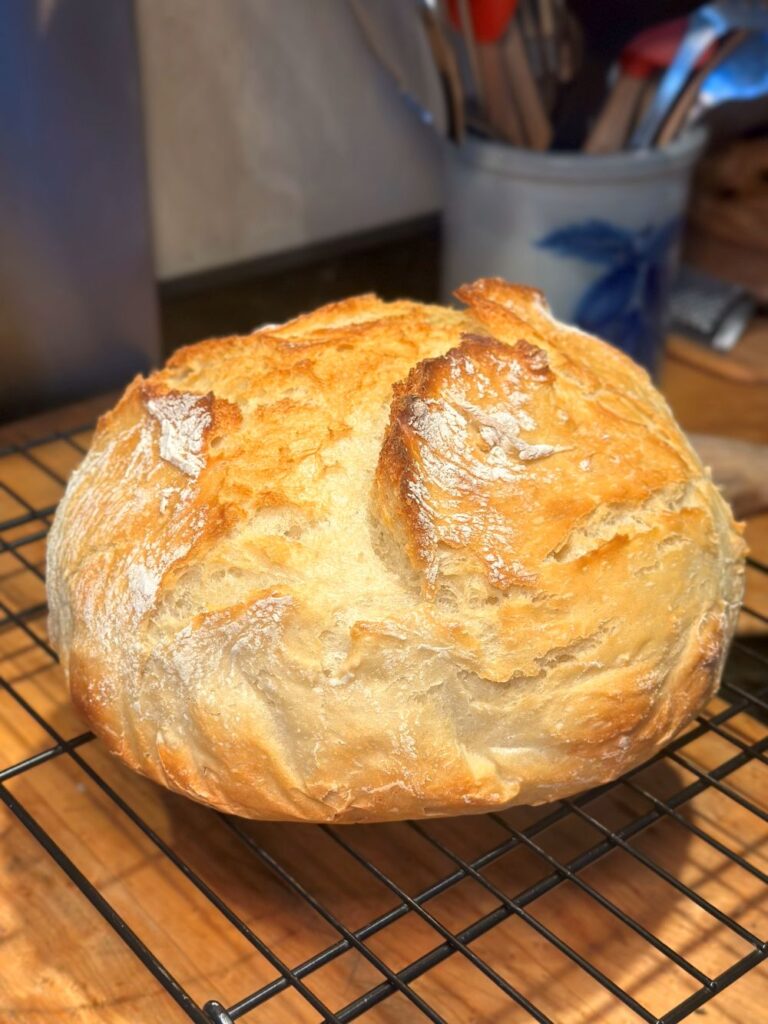
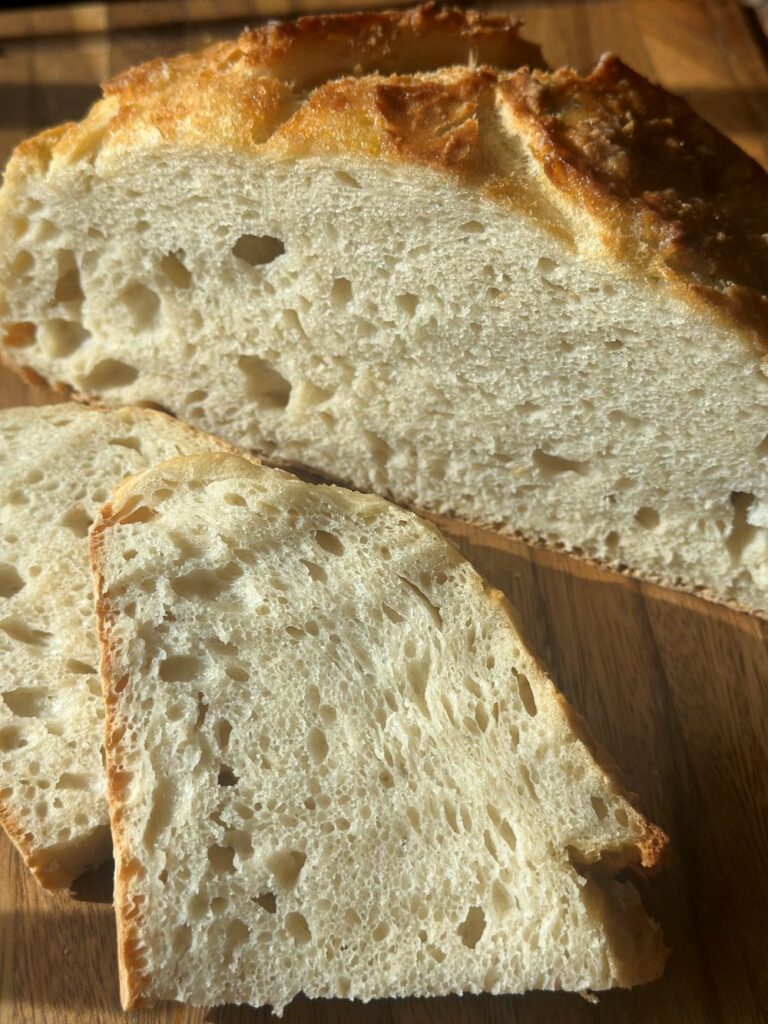
- Golden Crust & Soft Interior—Thanks to a sheet pan placed under the Dutch oven while baking, you’ll get a beautiful golden crust that isn’t too thick or hard on the bottom, along with a soft and airy interior.
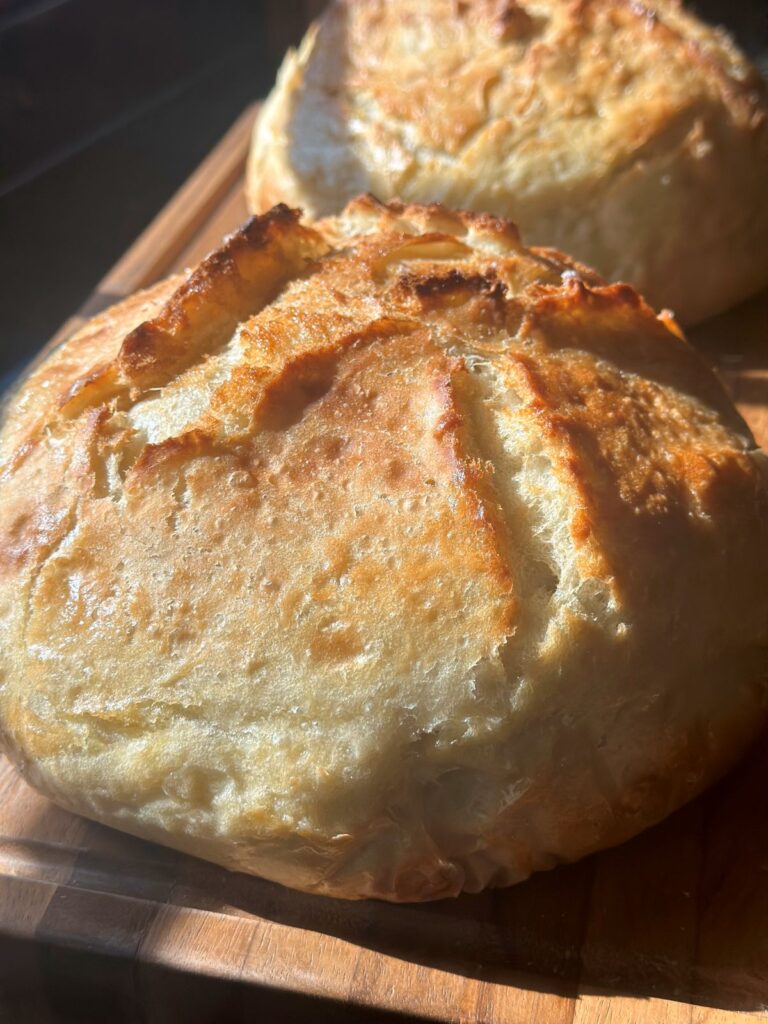
Think homemade bread is complicated? Think again! This artisan-style no-knead bread can be made in just a few hours with 5 ingredients and minimal effort—so you can have fresh bread anytime. Whether you’re a beginner looking to dip your toes into the world of bread-making or a seasoned baker, you’ll love this easy no-knead bread.
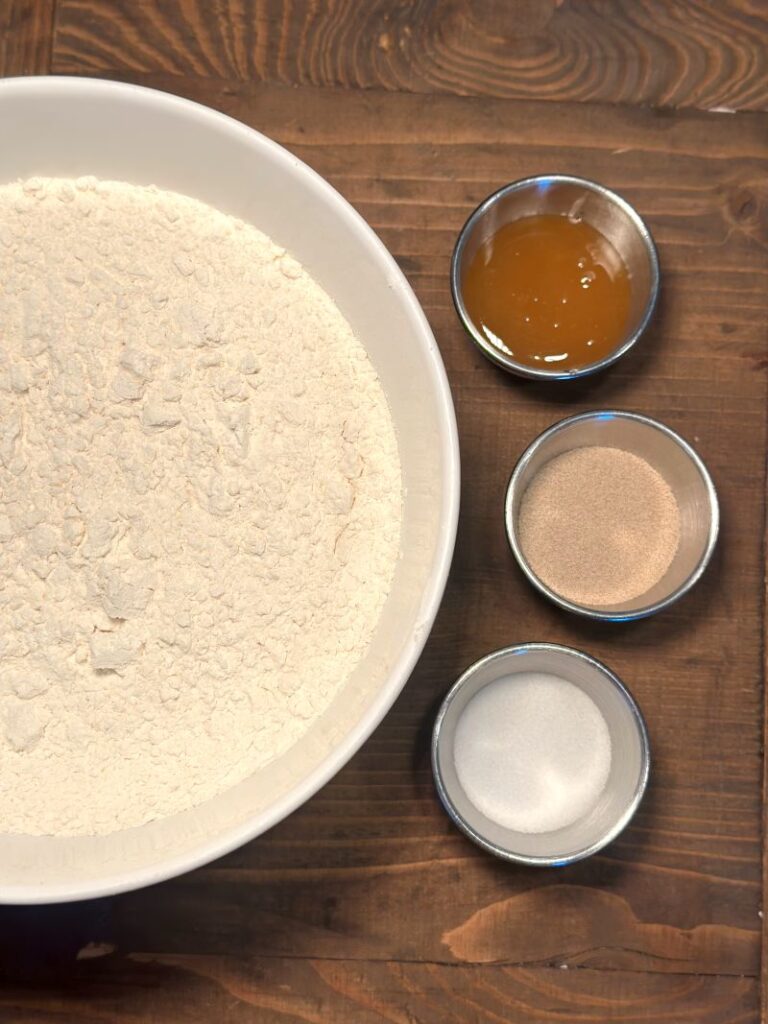
Just 5 Ingredients For Delicious Fresh Bread
Flour: I have tested this recipe with both bread flour and all-purpose flour, and the truth is that you can use either one and get a beautiful, delicious loaf of bread. That being said, I typically make this bread using King Arthur all-purpose flour.
Yeast: I recommend using instant yeast—I use this Fleischmann’s one. You can also use active dry yeast, subbing it in 1:1. If using active dry yeast, I recommend adding an extra 15 to 20 minutes to the rise time for the bread as active dry yeast rises a bit more slowly.
Water and Honey: Warm water is mixed with honey to create a perfect environment for the yeast to activate.
Salt: For flavor.
How To Make No-Knead Bread: Step By Step
1. Prep the dry ingredients.
Measure your flour—I recommend measuring it by weight using a kitchen scale (like this OXO one on Amazon). If you measure by volume, use the spoon-and-level method to ensure you aren’t adding too much flour. Add the flour and salt to a large mixing bowl and whisk together. Set aside.
2. Activate the yeast
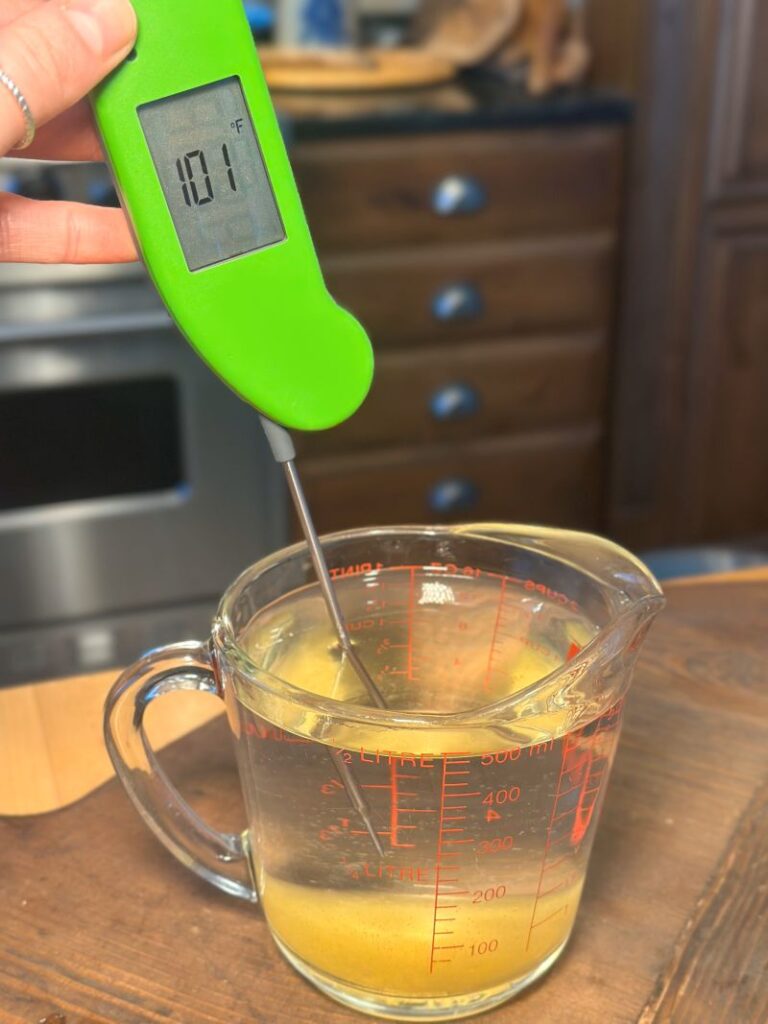
Add one tablespoon of honey to a glass measuring cup before filling it to the 2-cup line with water. Heat the water and honey to about 100-110 degrees (no warmer than 115 degrees). Stir so the honey dissolves. Then, add your yeast. In just a few minutes you should see small bubbles forming on the water’s surface—that means your yeast is active!
3. Combine the wet and dry ingredients.
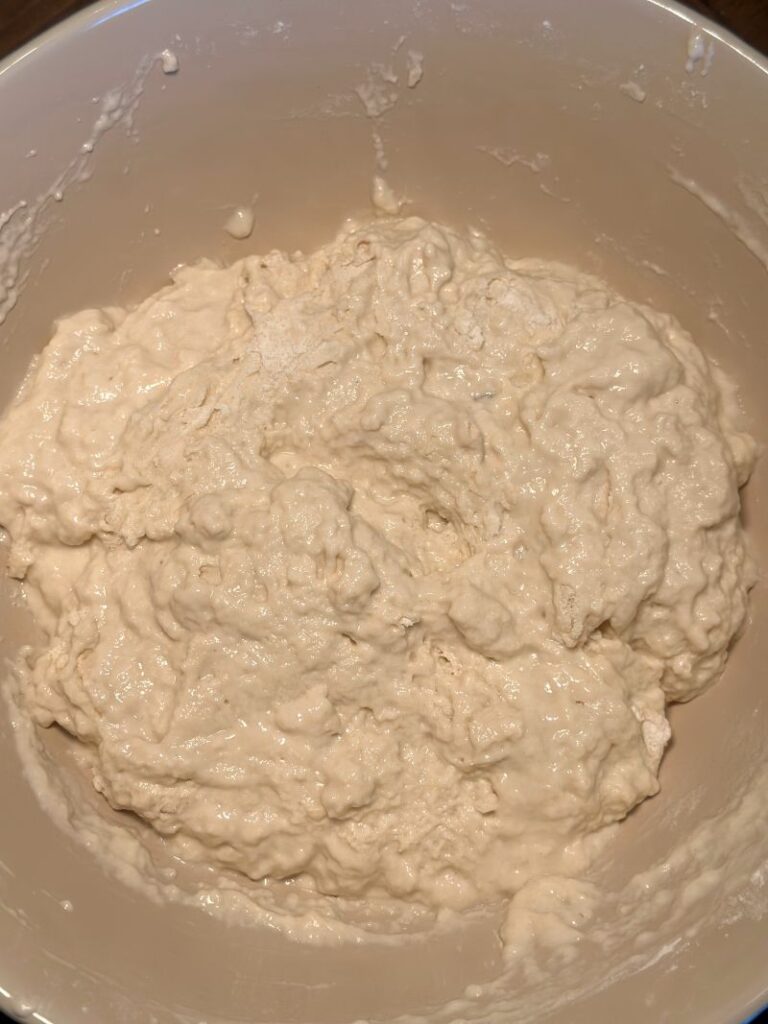
Make a well in the flour mixture and pour in the yeast mixture. Mix with a spoon or spatula until a shaggy dough forms. All the wet ingredients should be absorbed and you should not see any dry flour when you are done mixing the dough—as seen below.
4. Let the dough rise.
Place plastic wrap sprayed with cooking spray over the bowl. Then, place the bowl in a warm place until the dough has doubled in size. This should take about 1 hour using instant yeast, but keep an eye on the dough—you do not want it to rise past double its original size.
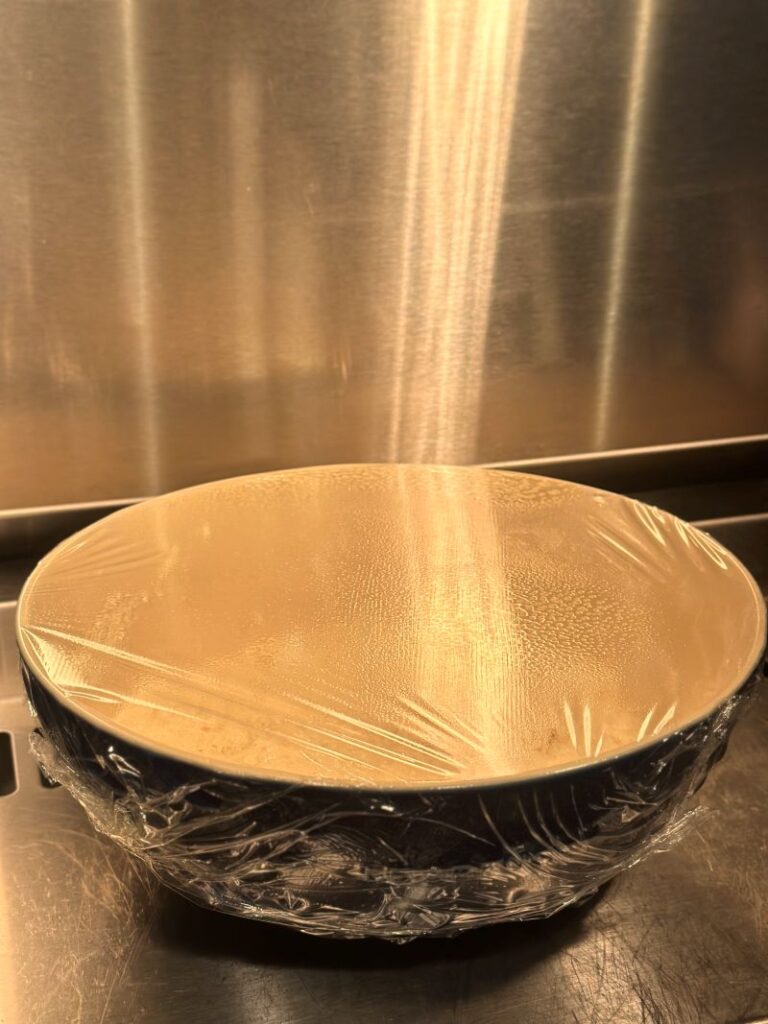
Where should you put the dough to rise? Depending on your home’s temperature, you may be able to simply set the bowl in a warm corner of your kitchen. Some people may prefer to place it in the oven with just the light turned on, or in an oven that has been heated to a very low temp and then turned off with the door cracked open. Some ovens have a dedicated proofing function or drawer.
I place the bowl under our range’s heat lamps, but I keep a very close eye on it. The heat from the lamps can cause the dough to rise very quickly and, as I mentioned earlier, you don’t want the dough to rise past double. So, whatever method you choose, I suggest checking on the dough and only allowing it rise to just double its original size.
5. Preheat your oven.
Once the dough has been rising for about 15-20 minutes, place your Dutch oven on the middle rack of your oven. Then, place a half sheet pan on the rack directly beneath the Dutch oven. This will deflect heat, preventing the bottom crust of the bread from becoming overly brown, thick, and crunchy. Preheat the oven (with both the Dutch oven and pan inside) to 450 degrees for at least 45 minutes. You want to make sure your Dutch oven is hot.
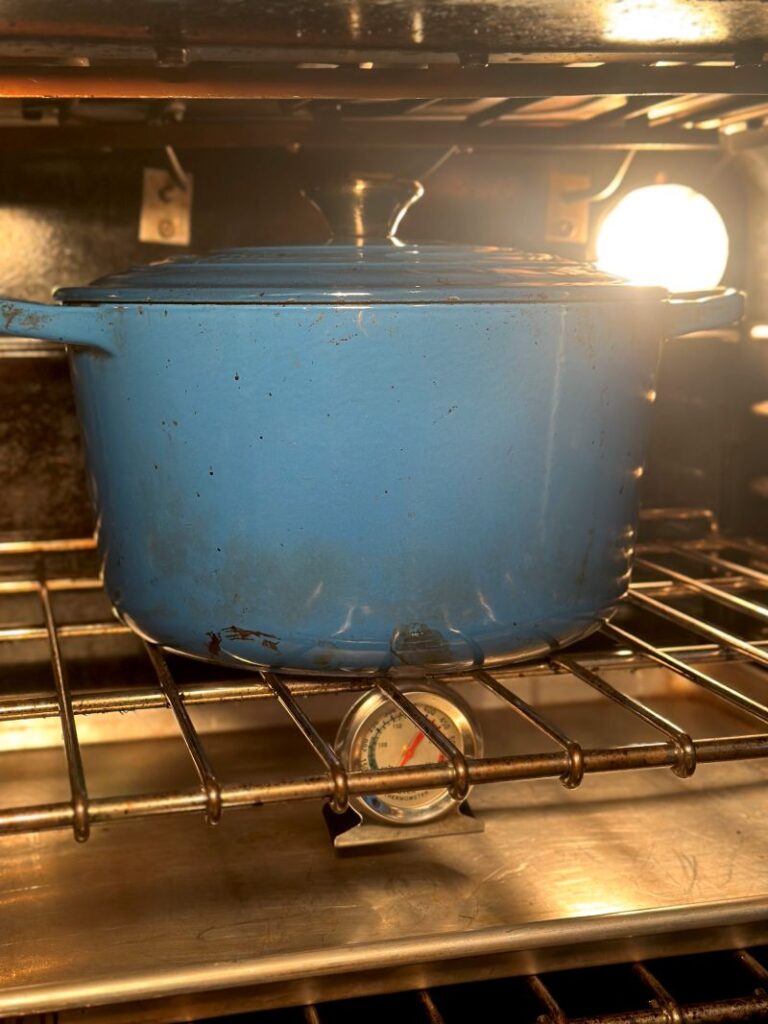
6. Cut a square of parchment.
Cut a square of parchment that will fit your Dutch oven. This parchment will serve as a kind of sling for you to easily transfer your bread dough into the Dutch oven, so you want it to be large enough to serve this function. For reference, I use a 12″ square for a 4.5 quart Dutch oven.
After you cut the square, set the parchment aside.
7. Shape your loaf.
Place the dough on a lightly floured surface. Now form the dough into a round ball by folding it in on itself. Gently grab the corners of the dough and fold them into the center, lightly pinching the dough to help it stay put. You might also use a bench scraper to help you fold in the dough. Repeat this process 3-4 times, or until the dough has formed a rough ball. (Basically, you’re doing three to four “stretch and folds”.) This dough is quite wet to start but you should notice it tightening up as you fold it inward, as you are naturally working a small amount of extra flour.
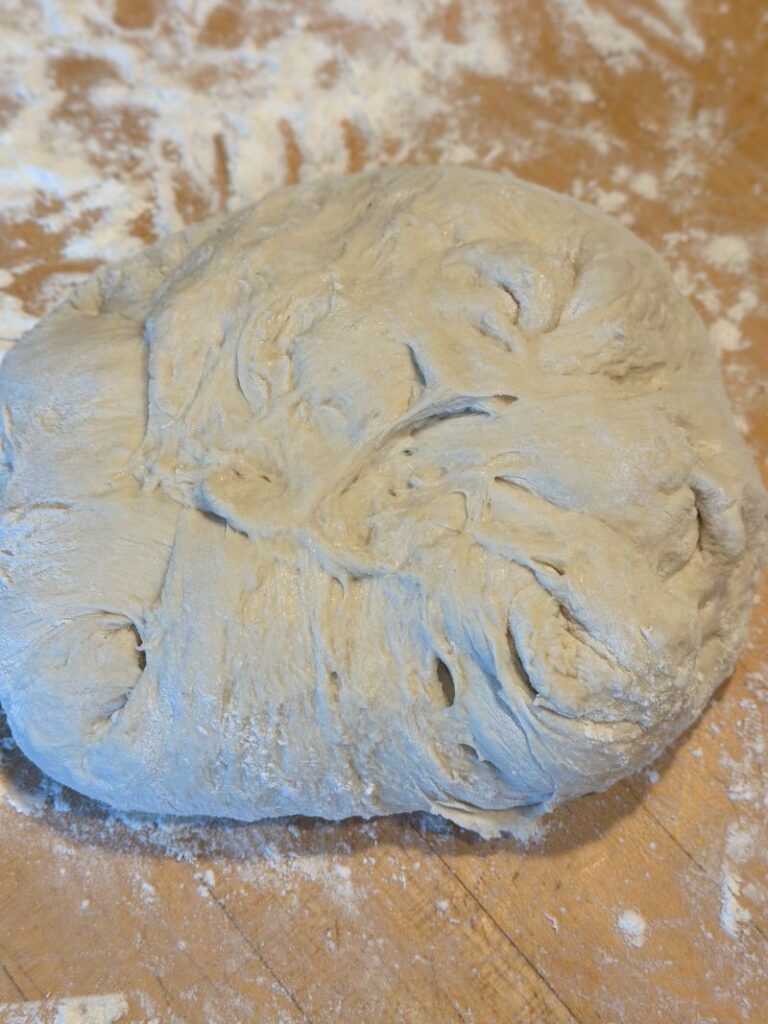
Use a bench scraper to help you flip the dough over. Then, use floured hands to gently shape the dough into a more rounded dough ball—although it doesn’t have to be perfect!
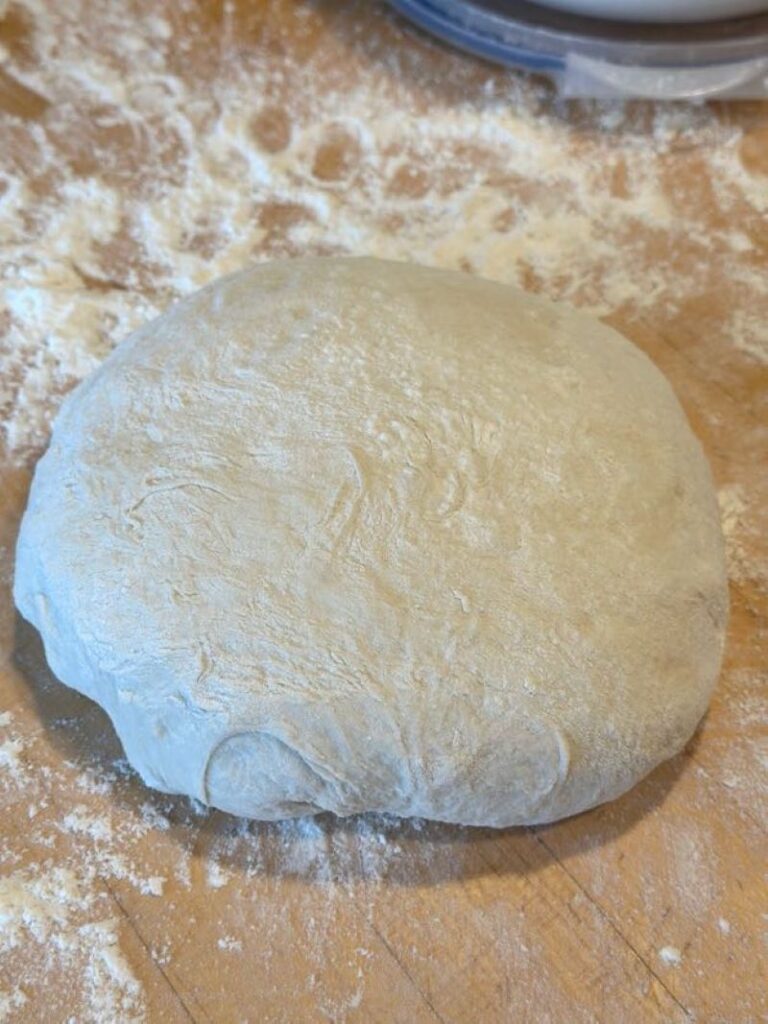
Now, use the bench scraper to help you place the dough in the center of the parchment square you cut earlier. Cut a half-inch deep X, line, or other design into the top of the loaf using a bread lame or razor blade. This will allow steam to escape while baking.
8. Bake your bread and enjoy!
Remove the hot Dutch oven from the oven. Use the parchment as a sling to transport your dough, folding the four corners up to meet each other above the dough ball. Remove the lid from the Dutch oven and carefully place the dough (and parchment) inside. Immediately place the lid back on the Dutch oven and put it back in the oven. The Dutch oven will be extremely hot, so be very careful during this process so as to not burn yourself.
Bake the bread at 450 degrees for 25 minutes with the lid on. Then, remove the lid and bake for another 5-8 minutes, or until the internal temperature of the bread reaches 200-210 degrees and the crust has browned to your liking. If the crust starts to look a bit too brown for your taste but the internal temperature has not reached 200 degrees, put the lid back on and keep baking.
I cannot recommend the Thermapen instant-read thermometer (shop on Amazon) enough for testing temperatures in recipes like this! It takes so much guesswork out of bread baking because you can easily and quickly determine the doneness of your loaves. You just unfold the Thermapen (which automatically turns it on) stick it into the loaf and it’ll immediately show you the temperature. You can also use it to test the temperature of the water before activating the yeast.
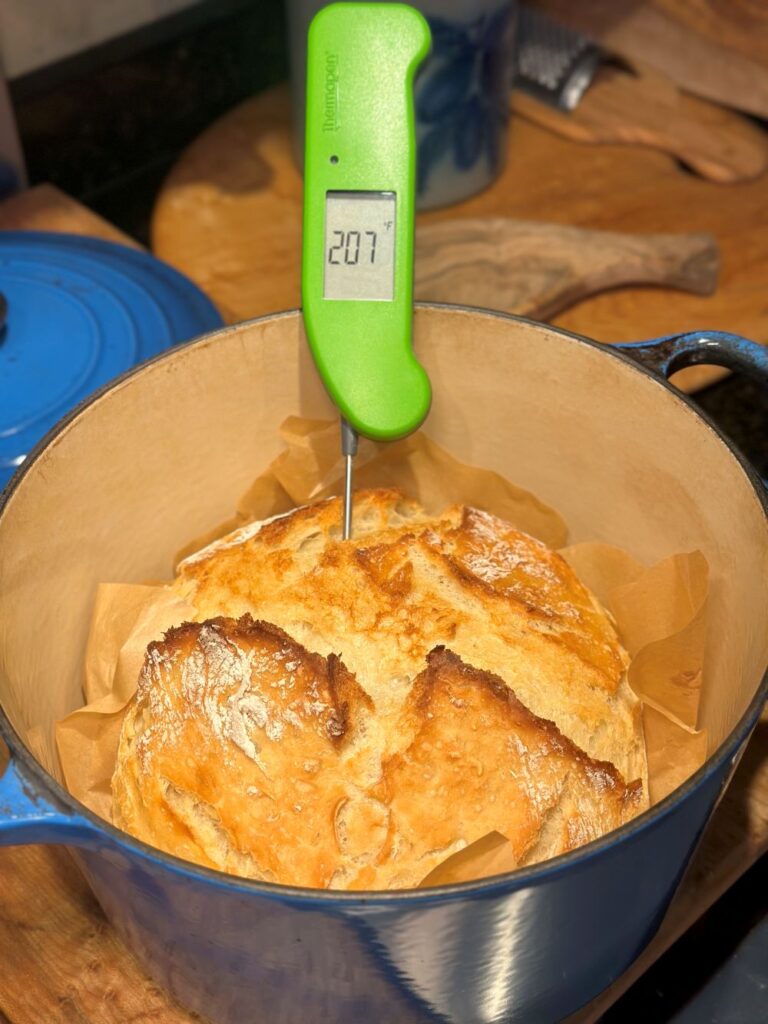
When you are satisfied with your loaf, remove the Dutch oven from the oven and tip it over to allow the bread to roll out onto your counter. Remove the parchment and place the loaf on a wire cooling rack using oven mitts—it will be hot!
Allow the bread to cool for at least 45 minutes to an hour before slicing it. During this time, steam will slowly escape and the internal structure of the bread will be able to set up properly. If you cut the bread while its still hot, it may appear sticky or gummy—which might lead you to believe it’s underbaked. However, if you have baked it to 200 to 210 degrees, it’s not underbaked—you simply didn’t give the bread enough time to properly cool and develop the internal structure.
Right after you place the bread on the cooling rack you may choose to brush butter all over the crust. This will soften the crust and add a bit of flavor! I LOVE to do this, but if you prefer a crisp, crustier crust I would skip this.
Storage
Once completely cooled, place any leftover bread in an airtight bag or wrap it in tin foil. Store on the counter for a few days. Keep in mind that this bread does not have the preservatives found in store-bought breads. However, if your house is like ours, the bread will be gone long before it has any risk of going bad! It’s even good after 2-3 days toasted—I think it’s way better than any store-bought bread.
Important Tips & Notes
- Make sure you preheat the oven with both the Dutch oven and the sheet pan inside. This is key for deflecting the heat properly and keeping the bottom crust browned but not thick and overdone.
- Although it is very tempting, do not cut into your bread right away. It needs at least 45 minutes to an hour to cool naturally and set up properly.
- If you want a soft crust, brush melted butter on the entire crust when the bread is fresh out of the oven.
Shop My Some of My Bread Baking Favorites
Shop all linked products on Amazon!
- I use King Arthur all-purpose flour in this recipe, but you can also use their bread flour—they both work and yield a delicious loaf! I highly recommend using a kitchen scale to weigh the flour—regardless of the kind you use.
- I cut off the end of one of these pre-cut parchment sheets to form a square.
- This Le Creuset Dutch oven is my go-to for this recipe.
- The Thermapen instant-read thermometer is so useful for quickly measuring the temperature of the water before adding the yeast and the actual loaf itself.
- A good bread knife, like this one from Henckels, is a must-have to cut your loaf.
Ready to bake? Find the full recipe for my favorite no-knead bread below!
Once you’ve given it a try, don’t forget to leave a rating and review—I’d love to hear how it turned out for you!
The Easiest No-Knead Bread
Equipment (Shop on Amazon)
Ingredients
- 4 cups flour (480 g) all-purpose or bread flour
- 2 tsp salt (12 g)
- 1 tbsp honey (20 g)
- 2 cups water; less 1 tbsp
- 2½ tsp instant yeast (about 7.5 g) or active dry yeast
Instructions
- Whisk together the flour and salt in a large mixing bowl. Set aside.4 cups flour (480 g), 2 tsp salt (12 g)
- Add the honey to a 2-cup glass measuring cup. Then fill to the 2-cup mark with water. Microwave until the water reaches 100°-110°. Once the water is warm enough, stir until the honey is dissolved.1 tbsp honey (20 g), 2 cups water; less 1 tbsp
- Add the instant yeast and stir until there are no large clumps. Allow the mixture to sit for a few minutes—until you see small bubbles forming on the surface, which indicates that your yeast is active.2½ tsp instant yeast (about 7.5 g)
- Use a spoon to make a well in your dry ingredients and pour in the yeast mixture. Stir with a spoon or spatula until all wet ingredients have been absorbed and a shaggy dough has formed. You should not see any dry flour.
- Cover the mixing bowl with plastic wrap (sprayed with cooking spray) and place in a warm place to rise until the dough has doubled in size, typically around 1 hour when using instant yeast. Note: If using active dry yeast, the dough may need an extra 15-20 minutes to double in size.
- Once your dough has been rising for about 15 minutes, place your Dutch oven in the oven on the middle rack. Place a sheet pan on the rack directly below the Dutch oven—this is important! Allow your oven to preheat to 450° for at least 45 minutes to ensure that the Dutch oven is very hot.
- Cut a piece of parchment into a large square that will fit your Dutch oven (I use a 12" square). Set aside.
- Plop the dough onto a lightly floured surface. Use lightly floured fingers and/or a bench scraper to gently form the dough into a ball by folding it in on itself. Grab the corners of the dough and fold them into the center, lightly pinching the dough to keep it in place. Fold all four corners in about 3-4 times.Then, flip the dough ball over so the smooth side is on top. Use floured hands to gently form the dough into a more perfect ball shape.
- Place the dough ball in the center of your parchment square and use a bread lame to cut a ½" deep line, X, or other design into the top.
- Remove the preheated Dutch oven from your oven and take the lid off. Fold the four corners of the parchment square up to meet each other above the dough and use it as a sling to carefully place the dough (and parchment) in the Dutch oven. Immediately put the lid back on and place it back in the oven.
- Bake the bread at 450° for 25 minutes with the lid on. Then, remove the lid and bake for another 5-8 minutes, or until the internal temperature at the center of the loaf has reached 200°-210° and the crust is golden. If the crust browns too much for your liking but the loaf is not yet done in the center, place the lid back on and continue baking.
- Remove the Dutch oven from your oven and carefully tip it over so the loaf rolls out. Using oven mitts, remove the parchment and place the bread on a wire cooling rack. Allow to cool for at least 45 minutes to an hour before slicing.Optional—Brush melted butter all over the crust of the bread when it is just out of the oven and still warm for a soft crust.
- Slice and enjoy your homemade bread! Once completely cooled, store any leftovers in an airtight bag or wrapped in tinfoil.
Notes from the Happy To Be Here Kitchen
Share This Recipe:
Recommended For You
If you liked this no-knead bread, I think you’ll love these recipes!
Pin the image below to come back to this bread recipe later.
