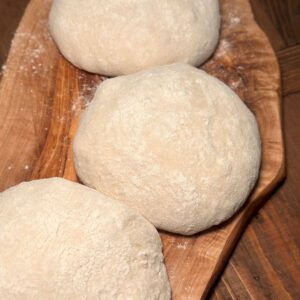
The Best Homemade Pizza Dough
This homemade pizza dough is incredibly easy to make, no matter your experience level. Requiring just 6 simple ingredients, this dough creates a perfectly chewy, crispy, and golden crust—perfect for your next pizza night. Trust me, the flavor and texture is so good, you'll never go back to store-bought crust.
Pin
Facebook
Email
Servings: 4 pizzas (10")
Equipment (Shop on Amazon)
- KitchenAid Stand Mixer with paddle and dough hook attachments
- Pizza Stone OR
Ingredients
- 2 cups water
- 1 tbsp honey
- 2½ tsp instant or active dry yeast
- 5-5¼ cups '00' pizza flour spooned and leveled; or about 580-609 g
- 2½ tsp salt
- 1 tbsp avocado oil or olive oil to coat the bowl
Instructions
- Place the water in a microwave-safe bowl or cup and heat until it reaches 110°F-115°F. Add the honey and stir. Then, add the yeast and stir until it has fully dissolved.2 cups water, 1 tbsp honey, 2½ tsp instant or active dry yeast
- Let the yeast mixture sit for approx. 5 minutes. You should see small, foamy bubbles forming on the surface, which is a sign that your yeast is activated.
- In the bowl of your stand mixer, add 5 cups of flour (about 580 g), leaving ¼ cup (about 29 g) set aside in case you need it. Add the salt and whisk together.5-5¼ cups '00' pizza flour, 2½ tsp salt
- Make a small well in the dry ingredients and pour the yeast mixture in. Briefly mix the wet and dry ingredients using the paddle attachment on your mixer (for about 30 seconds). You want the liquid to absorb and the dough to look shaggy.You can also use a regular spatula or spoon to accomplish this, instead of the paddle attachment.
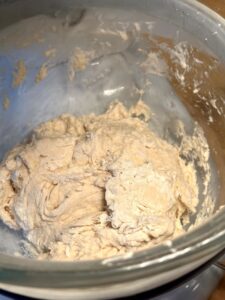
- Switch to the dough hook attachment. Mix the dough on low speed (maximum level of 2) for about 10 minutes. Scrape down the bowl from both the sides and bottom occasionally. It can also be helpful to completely flip the dough about halfway through mixing to make sure all ingredients are well incorporated. Important!!! After about 4 minutes of kneading, your dough should be starting to pull away from the sides of the bowl to form a ball. If your dough is not doing this, it may be a bit wet. At this point, add flour one tablespoon (about 7-8 g) at a time until the dough begins to pull away from the bowl—this is what the extra ¼ cup you set aside earlier is for!5-5¼ cups '00' pizza flour
- Take the dough out of the stand mixer and briefly knead it by hand on a floured surface (for about 2 minutes). Then, form the dough into a ball and place it in a medium bowl that has been coated in avocado oil, olive oil, or other neutral oil of choice. Flip the dough in the bowl so all sides of the ball have been coated in oil.1 tbsp avocado oil or olive oil
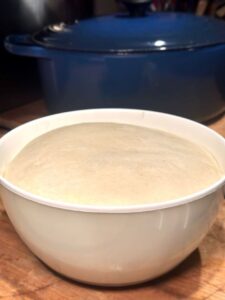
- Cover the bowl with plastic wrap and place in a warm place for approximately one hour or until the dough has doubled in size. Punch the dough down and allow the dough to proof again, this time for about 30 minutes.
- Preheat your pizza stone for 45 minutes at 450°-475°.
- Split your dough into 4 equal parts and gently form each into a ball. Dunk the ball in flour to coat all sides lightly.
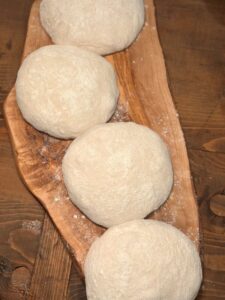
- Form your pizzas. Do not use a rolling pin. Simply push the dough using your fingertips into a 10" circle, leaving a thicker edge of dough for the crust. Place the dough on a piece of parchment or coat the bottom of the crust with semolina flour to prevent sticking.
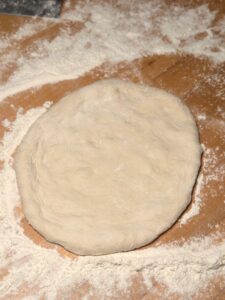
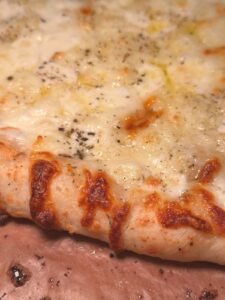
- Add your favorite sauce and toppings to the dough. Bake until the crust is golden brown and your toppings are cooked through (which will depend on what you have topped the pizza with and your specific oven temp).
- Store any leftover dough in a bowl covered with plastic wrap or in an airtight container coated with avocado oil or other oil of choice in the fridge.
Notes from the Happy To Be Here Kitchen
A bunch of helpful ingredient notes, proofing tips, tricks for shaping and baking your pizzas, and more are included in the post above (jump to them by clicking here). I recommend reading through all of the notes before diving into making this dough!
Share This Recipe:
Did you try this recipe?Click here to leave a rating and review!